- What if we could write plugins for Excel using the power of C# instead of VBA?
- What if we could target and maintain a plugin that is compatible with multiple excel versions, at the same time?
- What if we could provide our users with their familiar Excel workflow but add custom options, template generation, database access, and dynamic menus?
- What if I could create user defined worksheet functions (UDFs) that run fast and asynchronously?
… Enter Excel-DNA.
In this blog I give a tutorial on getting started with Excel-DNA, a project to build excel add-ins using .NET. By the end you will have a new custom tab in your excel ribbon that contains a button. I will also show you how to debug this excel plugin by running the project directly from Visual Studio.
All code can be found at https://github.com/andysprague44/excel-dna-examples/tree/master/HelloWorld
What is Excel-DNA?
Simply put, Excel-DNA is an independent open-source project to integrate .NET into Excel. If you were wondering, the ‘DNA’ stands for DotNet for Applications, as opposed to VBA standing for Visual Basic for Applications. The full introduction can be found at the home page on https://exceldna.codeplex.com/. Some getting started instructions can be found at https://exceldna.codeplex.com/wikipage?title=Getting%20Started.
If the above has stoked your curiosity, but you are already tied to a VBA add-in, this blog is not for you. Instead you need to switch, and for this you should visit the excellent blog at https://sysmod.wordpress.com/2012/11/06/migrating-an-excel-vba-add-in-to-a-vb-net-xll-with-excel-dna-update/
Getting Set-Up
Install Visual Studios, and add a new Class Library (.NET Framework) project called MyExcelAddin. (Note I’m using .net framework 4.7.2, but I’d be surprised if it didn’t work from 4.5 onwards).
Using the package manager console (Tools –> NuGet Package Manager –> Package Manager console) run the following:
Install-Package ExcelDna.AddIn
Install-Package ExcelDna.Integration
Install-Package NetOfficeFw.Excel
This should have resulted in a new file being created at the project root called “MyExcelAddin-AddIn.dna”. Leave it alone, but you don’t need to understand the contents yet 🙂
Building the ribbon
To add a custom ribbon we need 2 additional files – an XML description of the new custom ribbon element, and a class that implements ExcelDna.Integration.CustomUI.ExcelRibbon.
Add these both to the root folder of the project and call them ‘CustomRibbon.xml’ and ‘CustomRibbon.cs’
CustomRibbon.xml:
<?xml version="1.0" encoding="utf-8" ?>
<customUI xmlns="http://schemas.microsoft.com/office/2006/01/customui" onLoad="OnLoad">
  <ribbon>
    <tabs>
      <tab id="MyFirstExcelRibbonTab" label="My Custom Tab">
        <group id="HelpGroup" label="My Group">
          <button id="PressMeButton" label="Press Me!"
             imageMso="FastForwardShort" size="large" onAction="OnPressMe" />
        </group>
      </tab>
    </tabs>
  </ribbon>
</customUI>
We also have to add the XML file as an embedded resource. To do this go to the file in Solution Explorer, right click and go to properties. Then set the Build Action to ‘Embedded Resource’.
CustomRibbon.cs:
using System;
using System.IO;
using System.Resources;
using System.Reflection;
using System.Runtime.InteropServices;
using Application = NetOffice.ExcelApi.Application;
using ExcelDna.Integration.CustomUI;

namespace MyExcelAddin
{
    [ComVisible(true)]
    public class CustomRibbon : ExcelRibbon
    {
        private Application _excel;
        private IRibbonUI _thisRibbon;

        public override string GetCustomUI(string ribbonId)
        {
            _excel = new Application(null, ExcelDna.Integration.ExcelDnaUtil.Application);
            string ribbonXml = GetCustomRibbonXML();
            return ribbonXml;
        }

        private string GetCustomRibbonXML()
        {
            string ribbonXml;
            var thisAssembly = typeof(CustomRibbon).Assembly;
            var resourceName = typeof(CustomRibbon).Namespace + ".CustomRibbon.xml";

            using (Stream stream = thisAssembly.GetManifestResourceStream(resourceName))
            using (StreamReader reader = new StreamReader(stream))
            {
                ribbonXml = reader.ReadToEnd();
            }

            if (ribbonXml == null)
            {
                throw new MissingManifestResourceException(resourceName);
            }
            return ribbonXml;
        }

        public void OnLoad(IRibbonUI ribbon)
        {
            if (ribbon == null)
            {
                throw new ArgumentNullException(nameof(ribbon));
            }

            _thisRibbon = ribbon;

            _excel.WorkbookActivateEvent += OnInvalidateRibbon;
            _excel.WorkbookDeactivateEvent += OnInvalidateRibbon;
            _excel.SheetActivateEvent += OnInvalidateRibbon;
            _excel.SheetDeactivateEvent += OnInvalidateRibbon;

            if (_excel.ActiveWorkbook == null)
            {
                _excel.Workbooks.Add();
            }
        }

        private void OnInvalidateRibbon(object obj)
        {
            _thisRibbon.Invalidate();
        }
    }
}
This file has a bit of magic in it, but the method descriptions should be pretty self-explanatory. You are unlikely to need to change the above methods initially. What we will do is to add new methods to handle events raised from COM elements. You might have noticed there is an action on the button defined in the XML file called “OnPressMe” that currently does nothing. So lets make it do something!
First though, let’s take a short side-track and get our new excel add-in working in Excel.
Debugging the add-in from Visual Studio
To view the ribbon in Excel, we could set this up manually. First build the project, then open Excel and go to File –> Options –> Add-ins –> Manage: Go… –> Browse, and add the dll at MyExcelAddin/bin/Debug/MyExcelAddin-AddIn64.xll.
However, during development this loop is pretty slow. We can instead use Visual Studio so that Excel is launched with the add-in automatically attached when clicking Start. You might have been lucky enough that this was automatic (it was for me). But if not go the properties of the project (Alt + Enter from Solution Explorer) and choose ‘Start external program’ from the Debug settings and point to your excel location [on my machine, this was C:\Program Files\Microsoft Office\root\Office16\EXCEL.EXE].
Also add ‘MyExcelAddin-AddIn.xll’ to the Command line arguments.
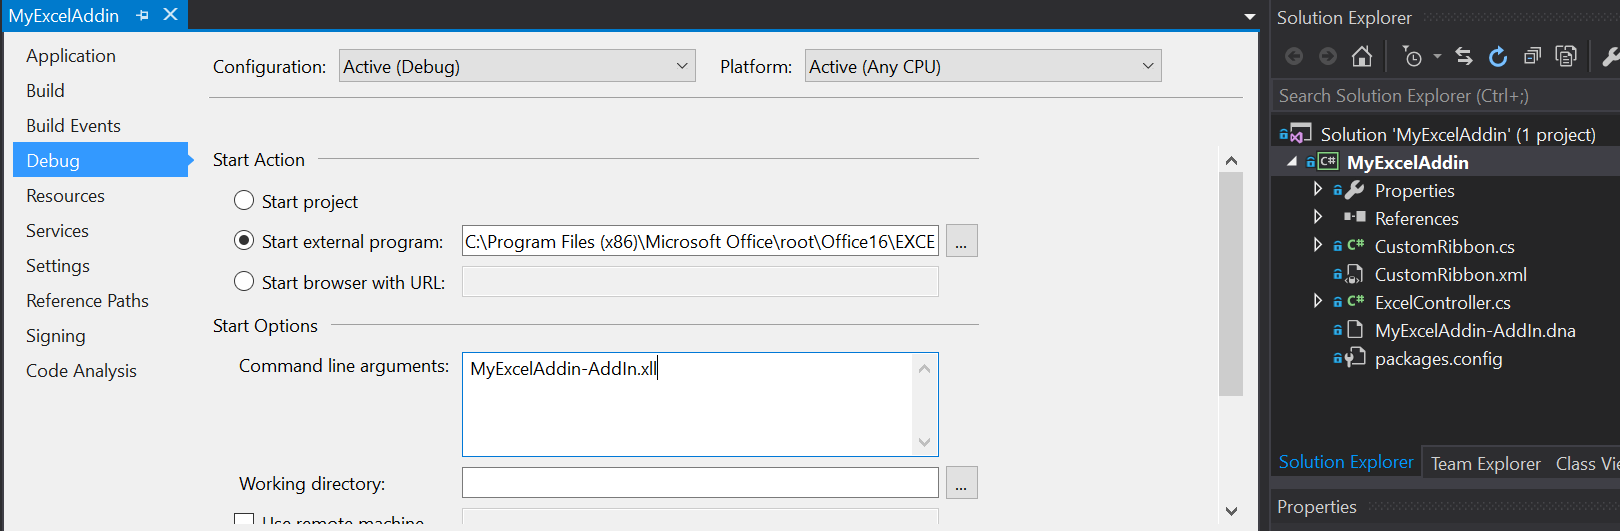
Now click ‘Start’. Excel should load up and have the plugin attached. You will need to click ‘Enable Plugin’ on launch if prompted.
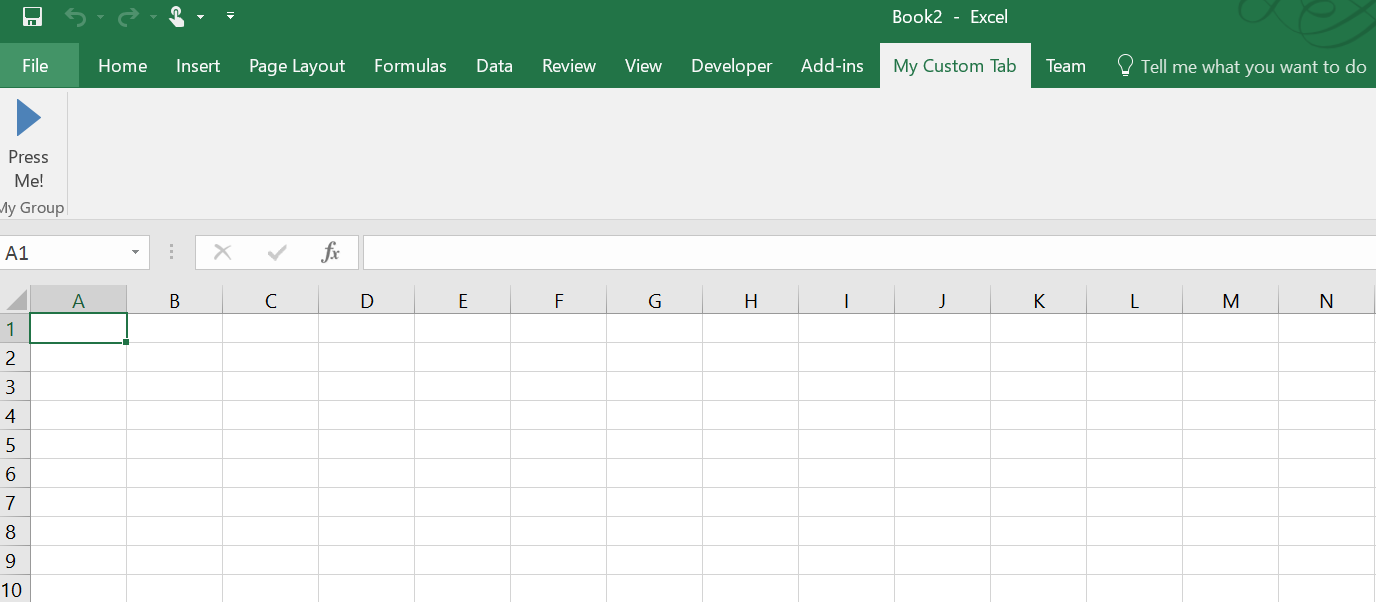
You should now see your new ribbon element in Excel!
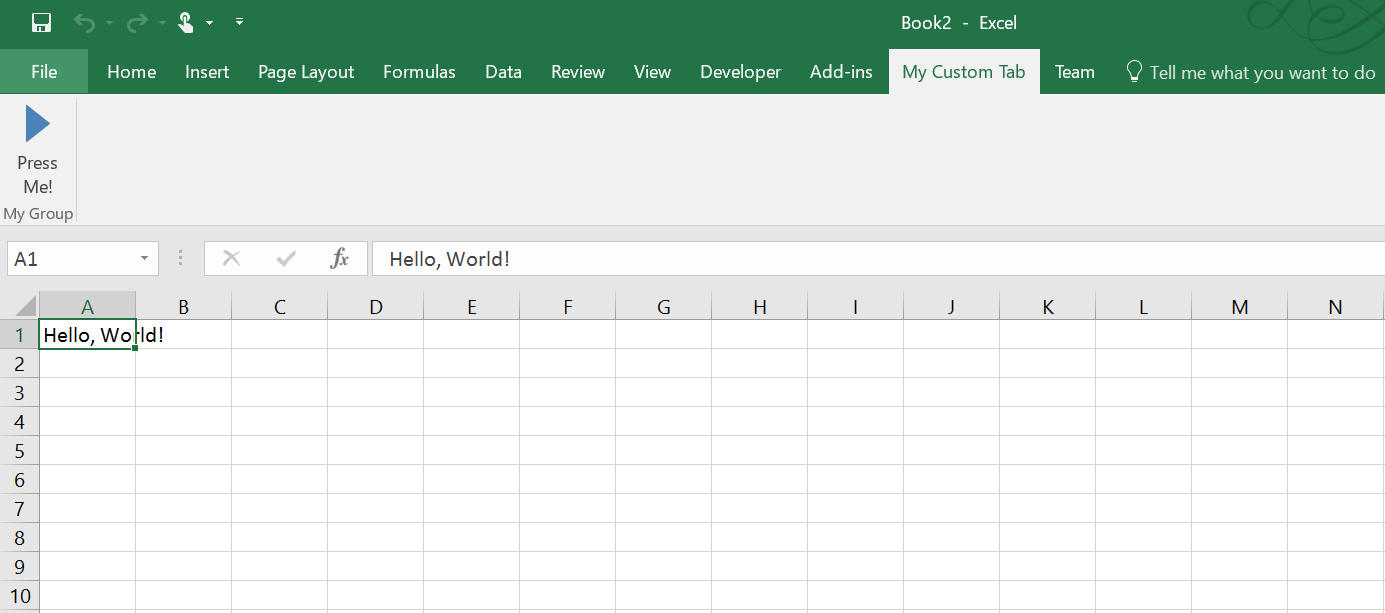
Doing something useful
The last step is to hook up the button to perform an action. In the spirit of all beginner tutorials the world over lets get it to write “Hello, World!” to cell A1.
To do this, we need to add an event handler for the action to CustomRibbon.cs. Add the following snippet to the end of the class:
public void OnPressMe(IRibbonControl control)
{
    using (var controller = new ExcelController(_excel, _thisRibbon))
    {
        controller.PressMe();
    }
}
Now, let’s add our controller. Add a new class to the project called ExcelController, and copy in the following code:
using System;
using Application = NetOffice.ExcelApi.Application;
using ExcelDna.Integration.CustomUI;
using NetOffice.ExcelApi;

namespace MyExcelAddin
{
    class ExcelController : IDisposable
    {
        private readonly IRibbonUI _modelingRibbon;
        protected readonly Application _excel;

        public ExcelController(Application excel, IRibbonUI modelingRibbon)
        {
            _modelingRibbon = modelingRibbon;
            _excel = excel;
        }

        public void PressMe()
        {
            var activeSheet = _excel.ActiveSheet as Worksheet;
            activeSheet.Range("A1").Value = "Hello, World!";
        }

        public void Dispose()
        {
        }
    }
}
Now, restart your application and click the button, voila!

Very nice post andy. Well done clear and good topic too
LikeLike
Thanks Sacha, appreciated
LikeLike
This was very helpful in getting started, thanks
LikeLiked by 1 person
Hi not sure why the dependency of NetOffice was needed for the ribbon? I think ExcelDna does this without any external dependencies.
I guess it didn’t do it when you first wrote the post.
Correct me if i’m wrong.
LikeLike
You are correct – however the 2 libraries work well together to give you enough control to get what you need done, as I’m assuming the ribbon is a starting place to customize excel and not the full solution.
LikeLike
Also check out https://andysprague.com/2023/03/14/my-first-custom-excel-dna-add-in-dotnet6-edition/ if you haven’t already!
LikeLike